Tuesday, May 25, 2010

A quick fix, and an unlikely model

IMG_6645

IMG_6644A friend brought a dance recital costume by for a quick fix while Siu Jeun was napping one morning.  (The little rainbow band that you see around the waist had to be attached.) Siu Jeun woke up while I was stitching it on. My friend, being the sweetheart that she is, went downstairs to get him. By the time they came up to the sewing room, he was snuggled in her arms, head on her shoulder, rhythmically patting her back. As soon as he saw this tutu, though…it was a different story! He was all grasping hands and jumping feet. This guy would not rest until that tutu was where it belonged. On him! (Blame it on having a big sister who likes to dance around in tutus!)


Oh well. Blue is a lovely color on him!

Sunday, May 23, 2010

Thing 20: Lemonade Dress!

I'm sorry - this is the best picture I have of it! I saw this tutorial over at Ruffles and Stuff and knew that I had to try it out. This? Is the basis of my Summer Uniform. At the moment, I have a very limited number of thread colors on hand...so most of my colored shirts are safe. The black and white ones, though? They are cowering in fear. Their days as tee-shirts are numbered, y'all. 

(If anyone is local, I'm leading a session on Wednesday morning for our Relief Society "Crafty Playdate", and we're making these dresses. Let me know if you need more info!)


(This is us....in Boston! We took a quick overnight trip with my husband's aunt and uncle. Boston, you're beautiful and I LOVE you.)

The bonnet was a NYC Chinatown find a few weeks ago, and the sandals are a throwback to my Pacific Northwest Days. Lo Gung declared me Utterly Pacific Northwest. I said 'thank you.'


Friday, May 21, 2010

Thing 19: Purple 'Parkly Pillow


My daughter lost the vote on the color of her new bedroom walls (my "pink" vote bested her "purple" vote). Our compromise? Purple pillows!

She picked out the fabric herself...and check it out! My first buttonhole! It turns out...it's just as easy as the Brother manual says! Long Live Automatic Buttonhole Features. Oh, and I did the button by machine, too. BOOyah.

(I cut the case a little too small, and the opening was gapping. Thus...the button. It was necessary!)
Posted by Picasa

Wednesday, May 19, 2010

QIP: Hedgerow quilt, arranged!

IMG_6651

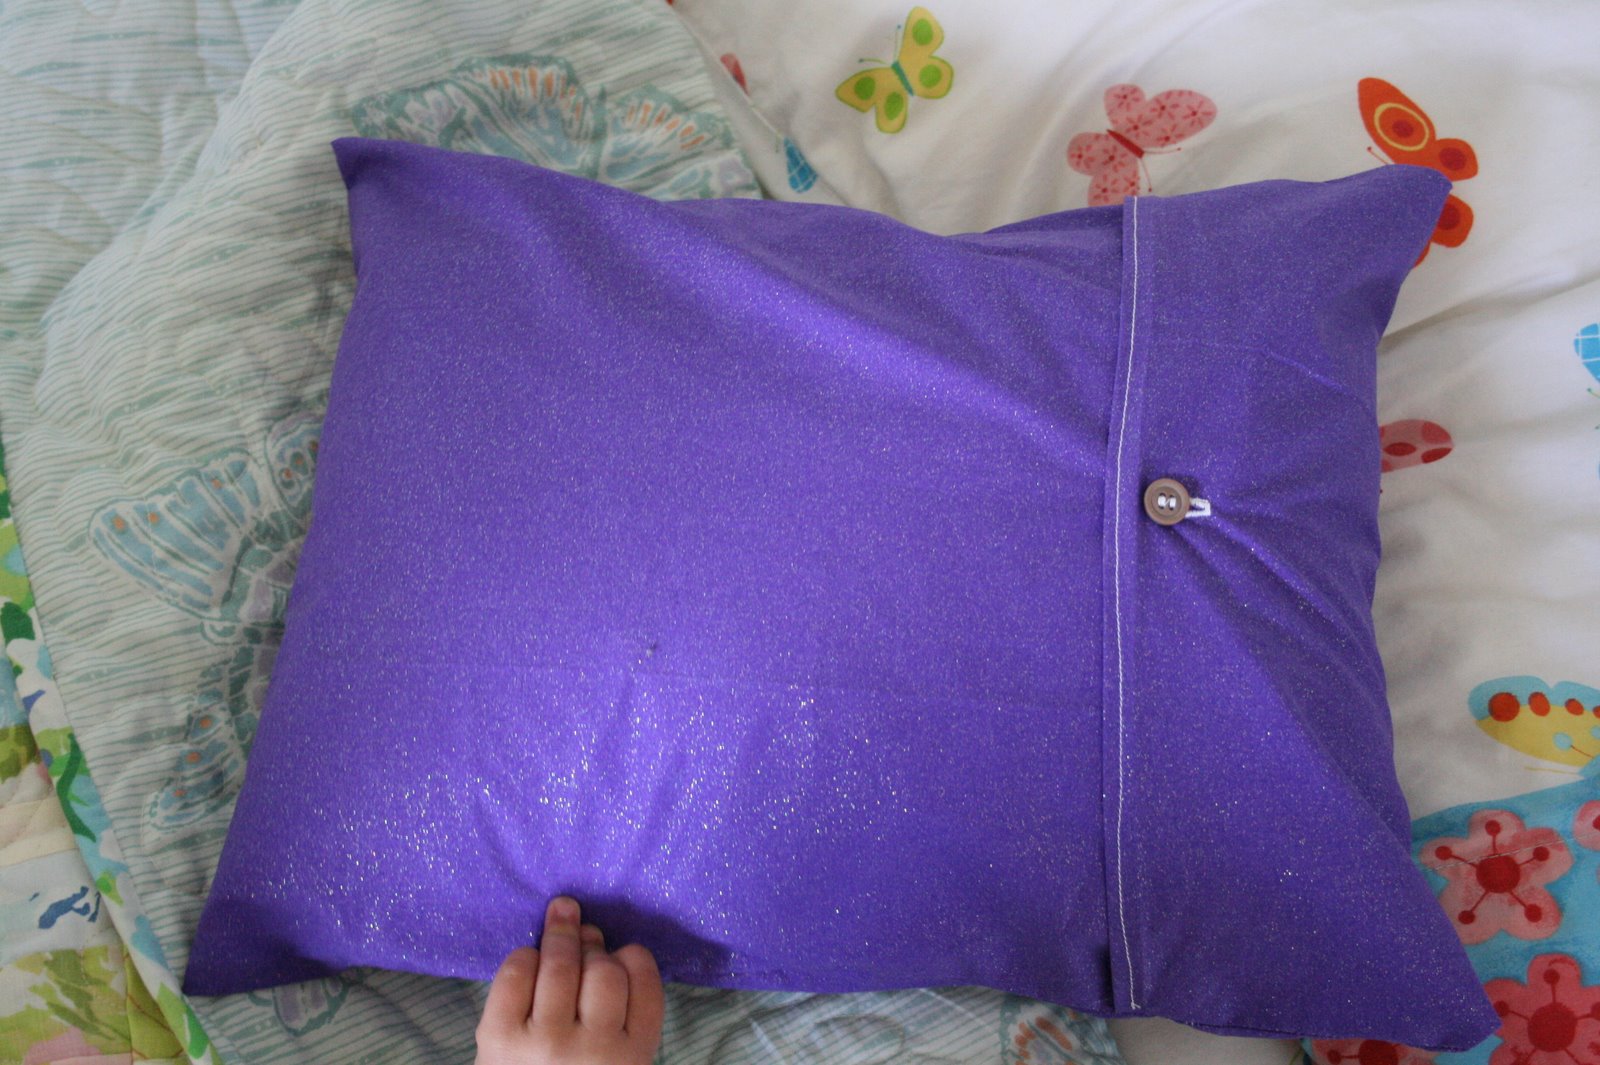
That? Is one. large. quilt. Each block is about 12” square.

I finished half of the vertical sashing today. More pictures later! (Sorry for the weird lighting. I roped Lo Gung into helping me arrange it all after the kids went to bed on Monday night. He has a great eye for color and mixing patterns! Besides, we both knew that if I did it on my own, and he didn’t like the end result, I’d throw a major hissy fit. It was a mutually beneficial arrangement. *grin*)

Wednesday, May 12, 2010

QIP: A Nine-Patch Sort of Thing

IMG_6643

It’s a start. I went out and bought the sashing material for this quilt yesterday…and then realized I couldn’t NOT pre-wash it. My blocks are all made from repurposed bed linens (i.e. – fabric that has been washed DOZENS of times and will never shrink again). And the sashing? Is brand new cotton. That will shrink. A lot.

So…that quilt is on hold until I do laundry again. It could be a while. Laundry me no likey. Heh.

In the meantime, I took all the scraps left over and started work on a new quilt! What do you think? (That block up there is approximately 4”x4”. Hello, Itty Bitties! ) I’m totally winging this one. I took all my scraps and sewed them into long strips. Those strips were cut into 32” lengths, and then sewed together into random groupings of three. Those groupings were sliced up to make the rows you see above…which were then put together to make blocks. After I counted it up, it looks like I have enough to make 126 of those little 4” blocks. So, maybe a lap quilt? This is my favorite way to create – just take what I have in front of me and start putting it together!

Monday, May 10, 2010

Thing 18: A Big White Tutu

IMG_6613 IMG_6609 IMG_6612

My daughter had a birthday party to attend, and this is what I came up with to send with her. It’s super simple – 7.5 yards of white tulle, folded in half lengthwise. I put in a 1” seam on the fold, making a casing for my elastic. After I fed the elastic through, I sewed the ends of my elastic together, tried it on my daughter, and trimmed off enough so that she could comfortably walk. Easy peasy! The little pink bow is hand stitched right onto the elastic where it meets together. I didn’t even sew the tulle back to itself!

Sunday, May 9, 2010

Mommyhood and Creativity

(Originally Published on May 5, 2010 at Suburban Housewife Uprising)


Have you seen this? If not, please take a moment to do so. I agree with this video whole-heartedly..and it has definitely changed my view of myself.


I'm a mother. It was my choice, my dream, and my goal. I've always wanted to be a mommy. When I entered the workforce after college, I just couldn't find my groove. I took no pride in the filing and data entry jobs that came my way. (Looking back, I realize it's because there was no creativity involved...just drone work. If I had been doing something like working in a craft based shop, the story might have been really different!)

Now that I'm a Mom, though...it's so easy to get overwhelmed. I think that's why I started to craft. Playdates and kid-approved dinners can only get you through so much. I needed to create something that couldn't be eaten, torn apart or smashed. Something that would beautify my surroundings...and the fact that I could now make gifts for only a few dollars, instead of a few tens, didn't hurt either!

I craft for other reasons, too. There's something very soothing about hiding out in my craft room and sewing yards and yards of straight seams for a quilt, while I listen to the kids play (or fight?) downstairs. I need that escape coupled with a sense of accomplishment sometimes!

Sometimes, there are other distractions. Last Friday, a good friend and I ditched our kids and homes for the day and took off for an amusement park. All. day. long. We spent ten hours riding roller coasters, eating burgers, screaming and laughing. It was absolutely amazing - by the end of the day we were holding each other up and acting like (rather tired) high schoolers again. Good times, my friends.

So what do you do? I think all women are creative, to some extent. Some of us sew, some crochet, some paint, some just make a mean PB&J. What do you do to unwind and add to the world?

Friday, May 7, 2010

Thing 17: Red Dahlia with a Yellow Center

I spent an hour or so at a friend's house today watching her two youngest while she attended a Mother's Day Tea with her third youngest at school. I had my son with me while his big sister was at a birthday party. It was definitely the easiest babysitting I've ever done! My friend's two kids stayed asleep for the hour I was there, and my son just ran around the basement playing with the toys and trying to feed me blocks. Piece of cake.

While I suffered through the (insanely quiet and easy) afternoon, I worked on this. From start to finish, it took me one hour, one change of ric rac (I ran out of the red...but perhaps it's a happy mistake?) and four changes of thread. Not bad for an afternoon's work! As you can see, it's rather large - probably four inches across. I could see it adorning a headband, or becoming a brooch. A very large brooch. Yeah.....
This one very well might end up in the shop. The shop which is currently empty, so I'm not even going to bother linking to it. However, I put together a package today with a few aprons - donations for a friend's auction at work. I included a stack of business cards in the package. So...I guess I'd better put something in the shop? Yes? Seeing as how I'm playing "business" by sending the aprons into a REAL $1,000-per-table auction. Eek!

If you had all the time in the world, and the necessary skills...what would you most love to sell? I love to make aprons. I'm also really enjoying making quilts right now, and have been dreaming about sending a few of my babies out into the world. A quick search on Etsy revealed that the most expensive quilt available right now is $4,000. For a quilt. It's a wall - hanging. (It reminded me of a Show Pony - the quilt won a worldwide competition a few years ago, and then toured the globe doing its celebratory lap.) More normal quilts (baby sized) will set you back about $150, but those are generally made from designer cottons. I focus more on...repurposed bed linens, to put it politely. They are inexpensive, colorful, and it's always a surprise what you get. I like the challenge!

ETA: I take it back. Apparently, the most expensive quilt is actually this one. It's $12,000. But if you buy it, you can't have it until 2011, as it's currently in a show in Oslo. Huh. 
Posted by Picasa

Monday, May 3, 2010

LoLo Tute: Tiered Tee-Shirt Dress with a Sash

 IMG_5942

So, I got this hairbrained (harebrained?) idea to get some shirts for my daughter off the clearance rack at Target…and then turn them into fabulous dresses. (In theory, it’s a great idea. In practice…make sure you don’t get pajama tops, sized big for your daughter to grow into. The neckline of this dress has come close to slipping over her shoulders a few times. Live and learn, eh?)

Anyhow, start with a t-shirt that fits your child well across the chest and shoulders. Maybe something with a stained hem that you thought they couldn’t wear again? The, pick out three coordinating cotton fabrics. (A light weight cotton would be really great here. I just used what I had in my stash, and it made a very structured skirt.)

IMG_5931

Cut your tee shirt off about 8” down from the top of the shoulder, and play with your fabrics to figure out the order you want to go with.

IMG_5932

Figure out how long you want your skirt to be. I needed about 15”, so I cut my fabrics into pieces 5” wide. (You can definitely play with proportions here, as long as you get the total skirt length that you’re looking for. My tip is to measure your kid in all sorts of places so that you know how long you need to make things like skirts…without dragging them out of bed to try things on. Measurements like neck to shoulder, shoulder to belly button, shoulder to hip, hip to knees, hip to ankle…I now have a list of about 20 measurements for my daughter so I can play around and draft patterns after she’s gone to bed.)


IMG_5933

I wanted an A-line skirt, so I did some kind of fancy footwork with my ruler and disappearing ink pen. Basically, each tier of the skirt was 5” wider than the previous tier.

Let’s use the purple tier as an example. My shirt was 11” wide, so I cut two purple pieces that were 5” tall and 16” long. From each end, I measured in 2.5” and put a dot at the top edge of the strip. Then, I used my straight edge to connect the dot to the lower corner, and cut there. Does that make sense?

If it makes sense, continue on with your other two tiers, adding 5” to each one.

IMG_5934

Sew your skirt tiers together, but not to your tee shirt for now. 

IMG_5935

Now, here’s the part that’s a little weird. We’re going to make a little fake “sash” around the middle, with ties. Make your ties by cutting two pieces of fabric that are 6”x 15”. Make each piece into a sash by folding it lengthwise, sewing the raw edges, and then turning it right side out. Press and set aside.

To make your sash, take two pieces of cotton, 4” tall and a few inches wider than your t-shirt. Sew one to the front of the shirt (wrong sides together) and then one to the back.  When you sew them on, center the t-shirt on the strips, like so:

IMG_5936

What you’ll end up with are little flaps sticking off of either side.


IMG_5938

Fold the flaps back so that you have right sides together…

IMG_5939

and then sandwich your ties into it and sew it up.

IMG_5940

To finish your dress, turn your skirt inside out and fit it over your t-shirt section, right sides together, wrong sides matching. Sew around the entire perimeter, turn it right side out and you’re done!

IMG_5949